

Is it time?
Replace the pump rather than repair it when any of these is true: it is past seven to ten years old (published cost guides put the typical service life at about a decade, and the pits we opened agreed); it hums without moving water after the weep hole and intake are clear; it trips the breaker or GFCI more than once; it cycles every minute in a slow pit; the pump-down that took 15 seconds now takes 45 with a clean intake; there is oil sheen on the pit water or rust streaking from the seal; or it failed the monthly test and the cause was not the switch, the outlet or the check valve. A dead piggyback switch or a leaking check valve is a cheap part on a pump worth keeping. A tired motor is not.
If the pump is fine and the problem is water running back after every cycle, you want the check valve guide instead. If it runs constantly and the pit never empties, read that guide first; the fix may be the discharge, not the pump.
Size and match the new pump before you buy it
The pump has to fit three things: the water, the pit and the pipe.
The water. Measure the vertical lift from the pit floor to the highest point of the discharge pipe, the length of the horizontal run outside, and how fast the pit fills in a wet week (unplug the pump and time a 2-in. rise; an 18-in. pit holds about 1.1 gal per inch). Put those into the sump pump sizing calculator below and read the pump's curve at that head, not the headline gallons-per-hour on the box. A standard basement with 8 to 12 ft of lift and 4-in. drain tile is a 1/3 HP job: the Zoeller M53 moves 2,040 GPH at 10 ft. A pit that fills an inch a minute in spring, or a lift near 15 ft, wants the 1/2 HP M98 at 3,660 GPH or a 3/4 HP Wayne CDU980E at 4,600 GPH at 10 ft. Too much pump in a slow pit short-cycles itself to death, so bigger is not safer.
The pit. Measure the inside diameter at the top and the bottom (liners taper) and the depth. Zoeller recommends a basin 18 in. or larger for pumps with a swinging, variable-level float; its own vertical-float pumps are more forgiving, and Wayne specifies its CDU pumps for basins 11 in. and up. Wayne also calls for a 22-in. minimum basin height. The IRC's storm-drainage section (P3303) describes the standard pit as 18 in. across and 24 in. deep with a cover. In a pit under 14 in., choose a pump with a vertical or diaphragm switch, never a tethered float, and plan for a backup that does not need pit space.
The pipe. The new pump's discharge should match the riser, 1-1/2 in. NPT for every pump on this page. Never reduce the riser below the pump's discharge; Zoeller and Wayne both say so in their instructions, and a 1-1/4 in. riser on a 1-1/2 in. pump throws away flow you paid for. If the discharge run is long, stepping up to 2 in. after the check valve cuts friction loss. Measure the cord path too: 8 to 10 ft cords are standard, and the outlet must be reachable without an extension cord.
Buy at the same time: a new check valve (the old one has the same years on it as the pump), a union, a male adapter in the pump's thread size, a length of Schedule 40 PVC, and a lid gasket if the old one is torn.
Sump pump sizing calculator
Measure once during a hard rain: unplug the pump, time the rise for 60 seconds, plug it back in. Then enter the discharge path.
- Measured inflow 1.1 GPM; design flow with storm factor 10.0 GPM.
- Total dynamic head 13.0 ft (lift 9 ft + pipe friction 0.0 ft + fittings). Read the pump's curve at this head, not the headline GPH.
- For a finished basement add a battery backup rated for at least this flow, and a high-water alarm.
- Zoeller M98 Flow-MateScore 9.1 · 0.5 HP · 3660 GPH @10 ft
- Zoeller M53 Mighty-MateScore 8.9 · 0.3 HP · 2040 GPH @10 ftCheck price
- Wayne CDU980EScore 7.9 · 0.75 HP · 4600 GPH @10 ftCheck price
- Paid links.
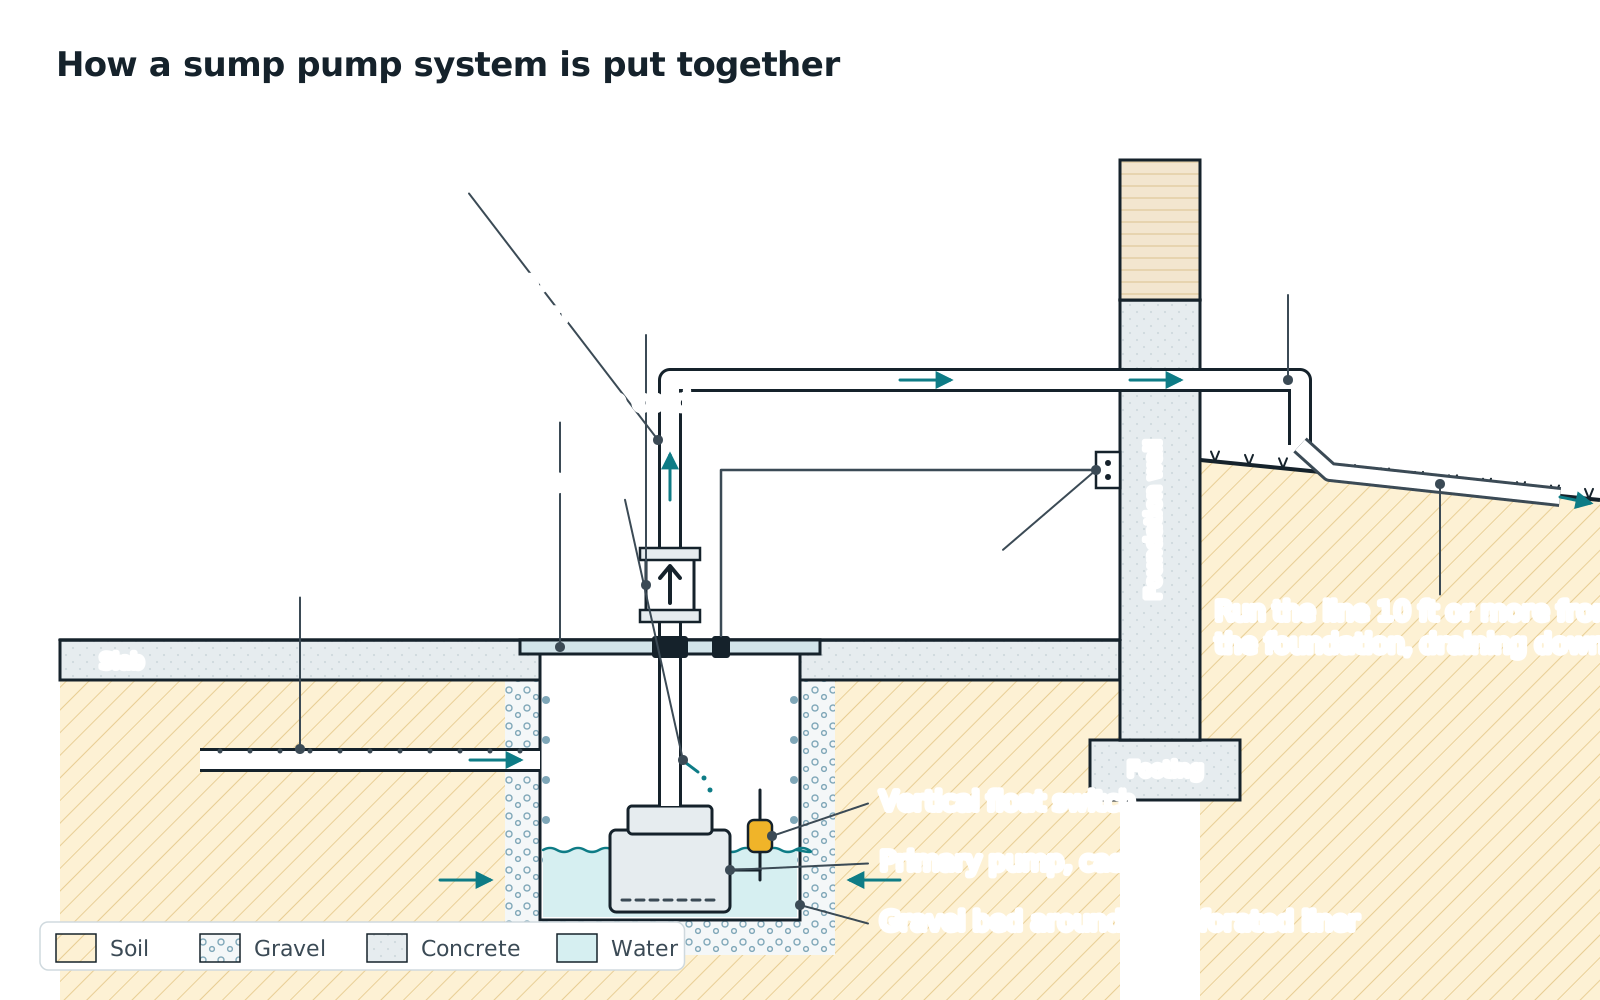
Tools and materials
Tools
- PVC cutter or fine-tooth hacksaw, deburring tool or utility knife
- Tape measure, marker, torpedo level
- Channel-lock pliers and an adjustable wrench; a strap wrench helps on a stuck union
- Drill with a 3/16 in. bit for the weep hole; 5/16 in. nut driver or flat screwdriver for hose clamps
- Wet-dry vacuum, bucket, sponge, stiff brush
- Flashlight or headlamp, nitrile gloves, safety glasses, old towels and a sheet of cardboard
Materials
- The new pump, sized above
- 1-1/2 in. PVC male adapter (threaded into the pump) and PTFE tape
- 1-1/2 in. Schedule 40 PVC pipe, enough for the riser plus a spare foot
- 1-1/2 in. check valve: a quiet-close spring type if a bedroom is above the pit, with rubber couplings and stainless clamps or solvent-weld ends
- 1-1/2 in. PVC union (or a combination union-check valve such as Zoeller's Unicheck, which its instructions recommend just above the basin)
- PVC primer and cement
- A flat paver or concrete block, if the pit floor is gravel or dirt; Zoeller's instructions say the pump must sit on a hard, flat surface
- Zip ties to secure the cord to the riser
- Replacement lid gasket or sealant if the cover no longer seals; a grommet for the cord
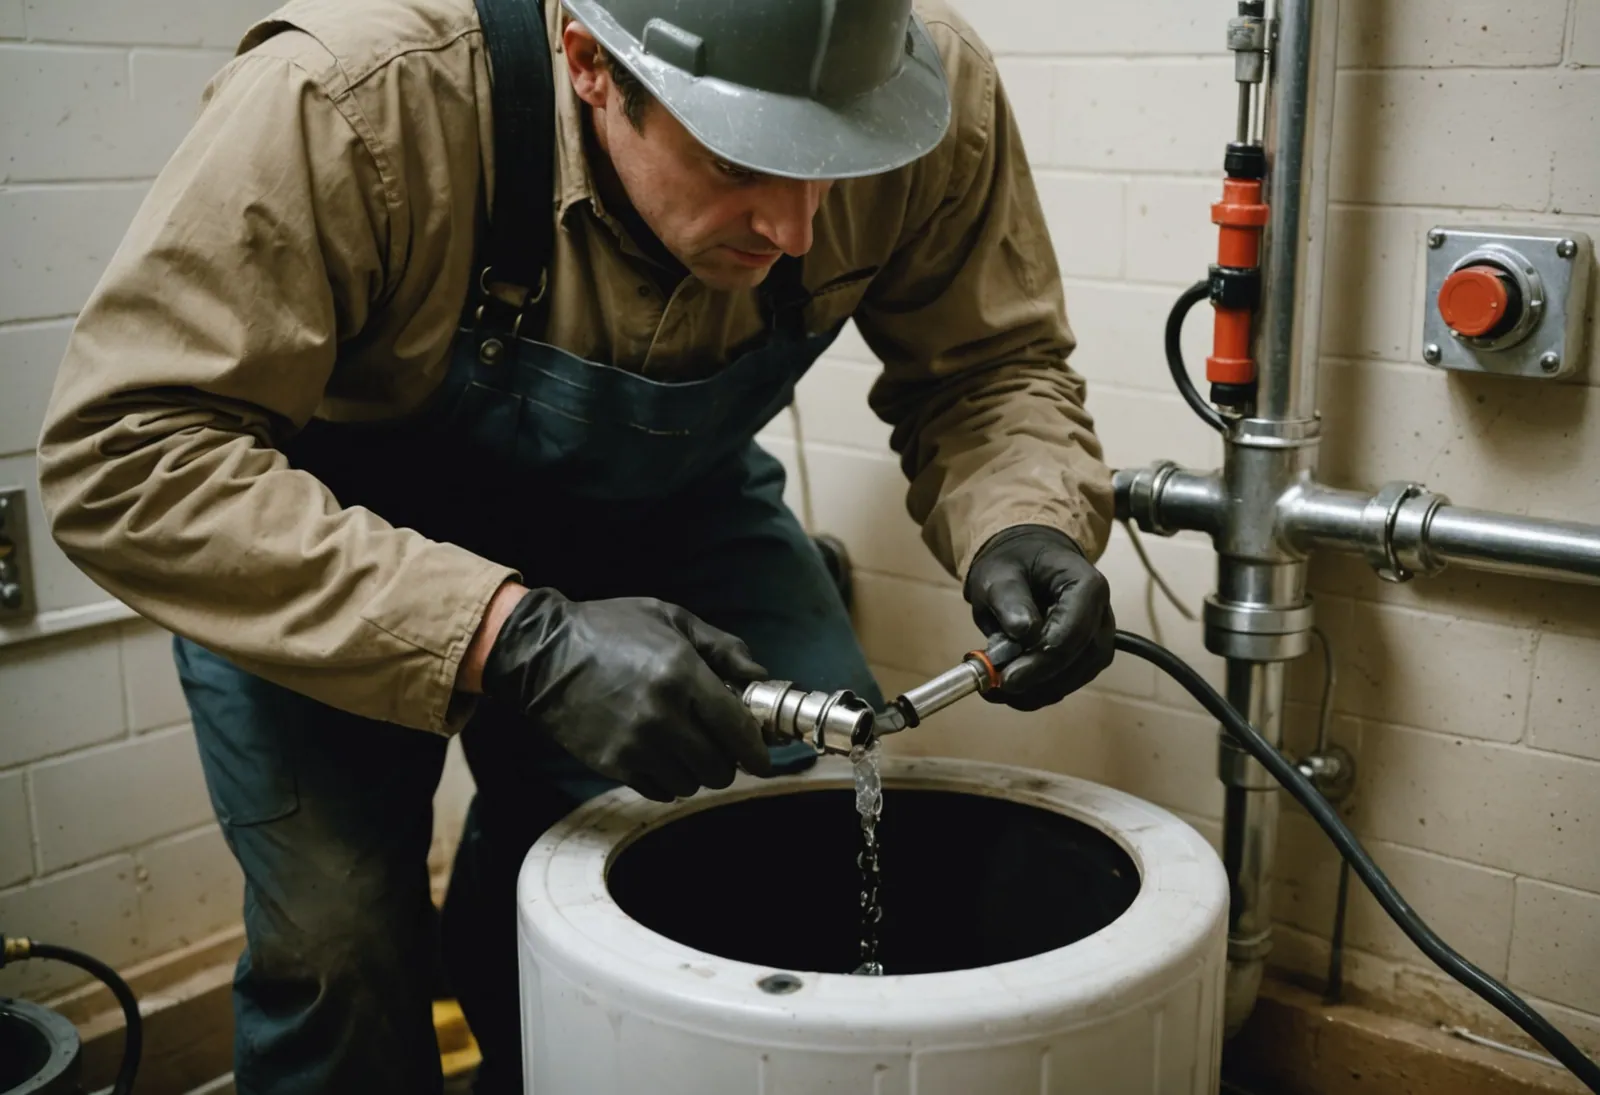
The replacement, in order
- 1
Kill the power and photograph everything
Unplug the pump at the wall; if the outlet is near the water, switch the breaker off first. Take photos of the riser, the check valve's flow arrow, the union, where the cord runs and how the lid sits. Note the water level in the pit and whether it is rising. If it is rising fast, this is a job for a dry day or a plumber, not the middle of a storm.
- 2
Pump the pit down and open the riser
Plug the pump back in briefly to pump the pit as low as it will go, then unplug it again. If the riser has a union, loosen the nut by hand or with a strap wrench and separate it; the water above the check valve will drain, so hold a bucket under it. If there is no union, cut the riser with the PVC cutter a few inches below the check valve, square and clean, leaving enough pipe above the cut to join to later. Vacuum the last inches of water out of the pit so you can see the floor.
- 3
Lift out the old pump and clean the pit
Lift the pump out by the riser stub or a handle, never by the cord, and set it on cardboard. Scoop and vacuum the silt, gravel and iron sludge from the floor, rinse the drain tile inlets so you can see them flowing, and check the pit walls for cracks or a liner that has shifted. If the floor is loose gravel or dirt, set a flat paver in the center and level it; a pump that leans lets the float hang up and sucks silt. This is also the moment to inspect the old check valve: it goes in the trash, not back on the riser.
- 4
Prepare the new pump
Wrap the male adapter's threads with three turns of PTFE tape and thread it into the pump discharge by hand, then one to two turns with the wrench; cast iron will not crack, but a plastic volute can, so stop when it is snug. Measure from the top of the adapter to where the union will sit and cut the first section of riser. If the pump has a tethered float, set the tether to the manufacturer's length and confirm the pump will be oriented so the float swings toward the open side of the pit, 180 degrees from the drain tile inlet if you can manage it.
- 5
Set the pump level with float clearance
Lower the pump onto the paver and put the level on it. Turn it so the float faces the widest clear space; Wayne's manual asks for at least 1 in. between the switch and the basin wall and free travel through its whole range, and that is a good rule for any pump. Lift the float by hand through its full travel and make sure it cannot touch the wall, the riser, the drain tile inlet or the cord. Run the cord up along the riser and leave it loose for now.
- 6
Build the riser: weep hole, check valve, union
Dry-fit the riser from the pump adapter up. Drill the 3/16 in. weep hole in the first section of pipe, about even with the top of the pump and angled down into the pit, below the check valve and below the lid, exactly where Zoeller's instructions put it; Zoeller notes some of its pumps have a built-in vent and still recommends the hole. Place the check valve 12 to 18 in. above the pump, arrow pointing up, with the union directly above it so the pump can come out without a saw next time. Rubber-coupled valves clamp on; solvent-weld valves get primed and cemented like any fitting. Mark every dry-fitted joint with a line across both parts so they go back in the same orientation. Then take it apart, prime, cement and reassemble, pushing each joint home with a quarter turn and holding it for ten seconds.
- 7
Join to the existing discharge
If you separated a union, thread the new half onto the riser and tighten the nut by hand plus a quarter turn with the wrench. If you cut the pipe, join the new riser to the old stub with a coupling, or with a rubber coupling and two stainless clamps if the two sections will not line up perfectly; torque the clamps until the rubber bulges slightly past the band. Check the whole riser is plumb and does not bear sideways on the pump. Secure the cord to the riser with zip ties, clear of the float, so it cannot drop into the water.
- 8
Lid, test, and log the date
Fit the lid with the cord and the riser through their grommets and seal it; a sealed cover keeps humidity and radon down and keeps debris off the float, and Zoeller's instructions say to cover the sump. Plug the pump into its own grounded outlet (a GFCI where code requires it; Wayne's manual calls for one), never an extension cord. Fill the pit with a hose until the pump starts, confirm a jet from the weep hole, watch it pump down and shut off, listen for a single clunk from the check valve with no water running back, and go outside to see water leave the discharge. Run three cycles and check every joint and the union for weeping. Write the install date on the lid with a paint marker.
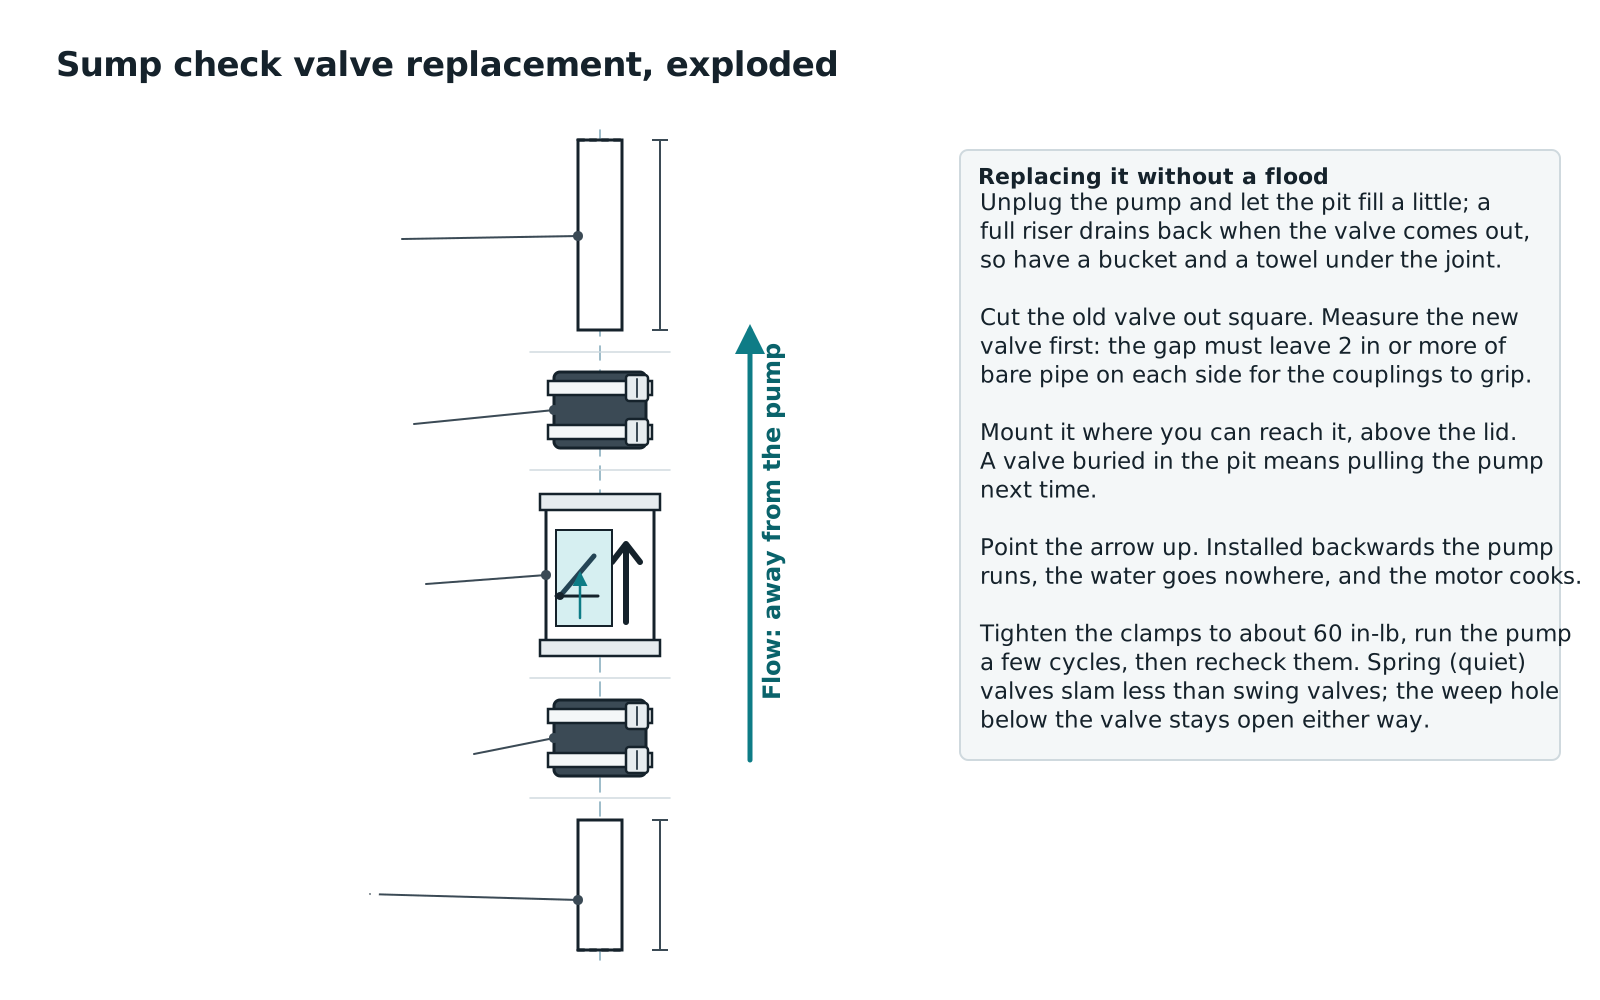
Mistakes that turn a good pump into a bad install
Reusing the old check valve. It has every year the old pump had. A new valve costs less than the gas to go back for one.
No union. Without one, the next replacement starts with a saw. Put it above the check valve where it stays dry.
Skipping the weep hole, or drilling it above the valve. Above the check valve it does nothing. Below the lid, above the pump, angled into the pit.
A tethered float in a narrow pit. It will hang up on the wall. Vertical float or diaphragm switch under 14 in.
Pump on gravel. It leans, the float sticks and the intake eats stones. Paver.
Reduced discharge. A 1-1/4 in. riser or a kinked flexible hose on a 1-1/2 in. pump throttles it; both manufacturers' instructions say to use full-size rigid pipe.
Cementing before dry-fitting. PVC cement sets in seconds and does not forgive a check valve installed upside down.
Extension cord. Zoeller and Wayne both prohibit it, and it is the first thing an insurance adjuster photographs.
No lid. An open pit is a humidity source, a radon path and a place for things to fall onto the float.
Which pump to put in
The three below cover most replacements. The M53 is the pump we found most often still running in pits older than its warranty, and it is the right answer for a standard 18-in. pit with a basement lift. The M98 is the step up when a 1/3 HP pump cycled every minute in spring or the lift is 12 to 20 ft. The Wayne CDU980E moves the most water for the money, fits basins down to 11 in., and carries a 5-year warranty; it is the pick for a fast-filling pit or a narrow one. Our sump pump roundup covers the rest of the field.
Zoeller M53 Mighty-Mate
The pump plumbers install in their own basements.
Best for most homes with a standard 18-inch pit and under 12 ft of lift.
Score breakdown
| Build material | cast iron | 10.0 |
| Switch reliability | vertical float | 9.0 |
| Right-sized flow at 10 ft of head | 2040 | 10.0 |
| Warranty | 3 | 5.0 |
| Head capability | 19.25 | 6.0 |
| Efficiency (lower amps) | 9.7 | 2.9 |
| Cord length | 9 | 1.6 |
| Solids handling | 0.5 | 10.0 |
| Thermal protection | true | 10.0 |
| Editorial adjustment | Field durability: on the sump failures our crews responded to, Zoeller's cast iron M-series pumps were the ones most often found still running past year ten; the paper warranty understates the service life we saw. | +1.0 |
Stars are DryHomeLab's rating from the published rubric (score ÷ 2, to the half star). Not a customer rating.
- Cast iron switch case, motor housing and base shed heat into the water
- Slow 1,550 RPM motor runs cool and quiet
- Vortex impeller passes 1/2-inch solids without clogging
- Auto-reset thermal overload protects a pump that runs dry
- 9-ft cord is short for deep pits; longer-cord versions cost more
- 9.7 A draw is high for the flow it delivers
- Flow falls off steeply above 15 ft of lift
- 3-year warranty trails Wayne's 5 years
The M53 is the pump we find most often when we open a pit on a water loss in an older home, and usually it is still running. It is a 3/10 HP, 1,550 RPM cast iron submersible with a non-clogging vortex impeller that passes 1/2-inch solids, an integral float switch, and an auto-reset thermal overload. Zoeller rates it at 43 GPM (2,580 GPH) at zero head and 2,040 GPH at 10 ft, with a 19.25-ft shutoff.
Where it shines is longevity, not peak numbers. Cast iron on the switch case, motor housing and base dumps motor heat into the water, and the slow 1,550 RPM shaded-pole motor runs cool and quiet. On a typical basement lift of 8–12 ft it moves plenty of water for a normal pit fed by 4-inch drain tile.
Where it falls short: the 9-ft cord is short for a deep pit, the 9.7 A draw is high for a 3/10 HP motor, and once your lift gets near 15 ft the curve drops hard. If your inflow test on our sizing calculator shows more than about 30 GPM at 10 ft, step up to the M98 or a 3/4 HP Wayne.
Buy it if you have a standard 18-inch pit, under 12 ft of lift, and want the pump most plumbers install in their own basements. The 3-year warranty is shorter than Wayne's five, but field survival is the better number.
Customer reviews: read them on Amazon (paid link). We link to them and never copy or score them.
Zoeller M98 Flow-Mate
Zoeller's 1/2 HP cast iron workhorse for high water tables.
Best for high water tables, long discharge runs, and lifts between 12 and 20 ft.
Score breakdown
| Build material | cast iron | 10.0 |
| Switch reliability | vertical float | 9.0 |
| Right-sized flow at 10 ft of head | 3660 | 9.8 |
| Warranty | 3 | 5.0 |
| Head capability | 23 | 9.2 |
| Efficiency (lower amps) | 9.4 | 3.2 |
| Cord length | 9 | 1.6 |
| Solids handling | 0.5 | 10.0 |
| Thermal protection | n/a | — |
| Editorial adjustment | Field durability: on the sump failures our crews responded to, Zoeller's cast iron M-series pumps were the ones most often found still running past year ten; the paper warranty understates the service life we saw. | +1.0 |
Stars are DryHomeLab's rating from the published rubric (score ÷ 2, to the half star). Not a customer rating.
- 3,660 GPH at 10 ft and a 23-ft maximum head
- Draws only 9.4 A for 1/2 HP
- Longer 9-1/2 in on / 3 in off switch range reduces starts per hour
- Cast iron motor housing sheds heat
- 9-ft standard cord
- 3-year warranty
- Short-cycles if installed in a pit with low inflow
- Thermal overload not stated on the product page
The M98 is the pump we recommend when an M53 is cycling every minute in spring. It is a 1/2 HP, 1,725 RPM oil-filled permanent split capacitor motor in a powder-coated cast iron housing, pulling 9.4 A, less than the 3/10 HP M53. Zoeller rates it at 72 GPM (4,320 GPH) maximum and 3,660 GPH at 10 ft, with a 23-ft maximum head. That is nearly 80% more water at a basement lift than the M53 for roughly the same current.
The switch is the snap-action vertical float with a 9-1/2 in on and 3 in off range, a longer cycle than the M53's, which means fewer starts per hour in a fast pit. The vortex impeller passes 1/2-inch solids and the shipping weight is 31 lb, so it sits firmly on the bottom of the basin.
Where it falls short: 9 ft of cord on the standard model, a 3-year warranty when Wayne gives five on its stainless and cast iron pumps, and Zoeller's performance at 10 ft is lower than Wayne's 3/4 HP CDU980E on paper. If you need lift above 20 ft, the M98's 23-ft head is the reason to pick it over the Wayne.
Buy it for a high water table, a long or tall discharge run, or any pit where a 1/3 HP pump cannot keep up during storms. Run our sizing calculator first; a 1/2 HP pump in a slow pit just short-cycles.
Wayne CDU980E
The most water per dollar at a real basement lift.
Best for fast-filling pits and homeowners who want the longest warranty for the money.
Score breakdown
| Build material | cast iron/stainless | 9.0 |
| Switch reliability | vertical float | 9.0 |
| Right-sized flow at 10 ft of head | 4600 | 6.7 |
| Warranty | 5 | 10.0 |
| Head capability | n/a | — |
| Efficiency (lower amps) | n/a | — |
| Cord length | 8 | 1.1 |
| Solids handling | n/a | — |
| Thermal protection | true | 10.0 |
Stars are DryHomeLab's rating from the published rubric (score ÷ 2, to the half star). Not a customer rating.
- 4,600 GPH at 10 ft on Wayne's own curve
- Stainless motor housing on a cast iron volute
- Fits basins 11 in and larger
- 5-year limited warranty
- Top-suction design pulls less silt
- 8-ft cord
- Running amps and solids handling not published
- Overkill for a slow pit; will short-cycle
- Wayne's own 10-ft figures differ between manual and web page
The CDU980E is a 3/4 HP submersible with a stainless steel motor housing on a cast iron volute, and Wayne's own curve puts it at 5,490 GPH at zero head and 4,600 GPH at 10 ft, still 3,500 GPH at 20 ft. That is more than double what a Zoeller M53 moves at the same lift, usually for similar money, which is why it is our value pick.
The design is top-suction: water enters above the base, so the pump is less prone to pulling in the silt that settles on the floor of a pit. The integrated vertical float turns on at 9 in and off at 4 in, with a solid polypropylene float that cannot waterlog. Wayne specifies it for basins 11 in in diameter and larger, which makes it one of the few 3/4 HP pumps that fits a narrow pit, and backs it with a 5-year limited warranty.
Where it falls short: the cord is 8 ft, the oil-filled motor has an automatic resetting thermal protector but Wayne does not publish running amps or solids handling, and the manual's performance table and the product page disagree slightly at 10 ft (4,600 vs 4,743 GPH; we use the lower manual figure). A 3/4 HP pump in a slow pit will short-cycle; size it with our calculator first.
Buy it if your pit fills fast in spring, you have a long discharge run, or you simply want the longest warranty on the shelf.
Customer reviews: read them on Amazon (paid link). We link to them and never copy or score them.
When a plumber is the right call
Four situations, and we would not argue with any of them.
The riser has no union and disappears into a wall or the slab. Cutting a pipe you cannot see the other end of is how a two-hour job becomes a flooded one. A plumber will cut in a union and a cleanout while they are there.
The pit is too small, too shallow, or not a pit. A hole in the slab with no liner, a 12-in. bucket, or a basin with no room for a float means the fix is a new basin, which is a jackhammer, a liner, gravel and a cover. That is a half-day for a waterproofer and the price difference between a swap and a new pit is in our cost guide.
The electrical is wrong. No outlet within cord reach, an outlet that trips with a known-good pump, a pump sharing a circuit with a freezer, or an outlet the pit could flood. An electrician adds a dedicated GFCI-protected circuit in an hour or two, and the pump install can happen the same day.
You want a backup done at the same time. A combo system with its own riser, check valve and float height is more plumbing than a swap; our backup install guide shows what is involved, and a plumber does both in one visit.
A plumber or waterproofer replaces a pump in a pit with a union in one to two hours. The form below reaches vetted local contractors through HelpMeNow.com; tell them the pit size and whether the riser has a union, and the quote will be close.
Frequently asked questions
Can I replace a sump pump myself?
Yes, if the old pump sits in a lined pit with a union on the riser and there is a grounded outlet within cord reach. The job is unplug, pump down, open the union, lift out, clean the pit, set the new pump level with float clearance, build a riser with a weep hole, a new check valve and a union, then fill the pit to test. Plan on two hours. Call a plumber if the riser has no union and vanishes into a wall, if the pit needs enlarging, or if the electrical needs work.
What size sump pump do I need to replace mine?
Size to the water, not to the old pump. Measure the vertical lift to the top of the discharge, the length of the run, and how fast the pit fills in a wet week, and read the pump's curve at that head. A typical basement with 8 to 12 ft of lift is a 1/3 HP job, around 2,000 GPH at 10 ft. A pit that fills an inch a minute, or a lift near 15 ft, wants 1/2 to 3/4 HP. Our sizing calculator does the head and friction math.
Do I need a new check valve when I replace a sump pump?
Yes. The old valve is as old as the old pump, and a worn flapper lets every gallon fall back into the pit so the new pump works double. Install the new valve 12 to 18 in. above the pump with the arrow pointing up and a union above it. Use a quiet-close spring valve if a bedroom is over the pit. Wayne's manual calls a check valve required and Zoeller's instructions call for a check valve and a union in the discharge line.
Where does the weep hole go on a sump pump?
In the riser just above the pump, about even with the top of the pump body, angled down into the pit, and always below the check valve and below the lid. Zoeller specifies about 3/16 in. and says to clean it periodically. The hole bleeds trapped air so the pump cannot air-lock after the pit runs dry; above the check valve it does nothing, and a hole above the lid sprays the basement floor.
How long does it take to replace a sump pump?
One to two hours for a plumber, two to three for a first-time homeowner, most of it dry-fitting the riser and cleaning the pit. Add an hour if the riser has no union and you have to cut and couple the pipe, and most of a day if the basin itself has to be replaced, which is jackhammer work and a job for a waterproofer. Fill and test the pit for three cycles before you call it done.
What is the most common mistake when installing a sump pump?
Float interference. A tethered float in a narrow pit, a pump set on gravel so it leans, or a cord left loose in the pit will hang the switch up and the pump either runs forever or never starts. After that: reusing the old check valve, skipping the weep hole, reducing the discharge pipe below 1-1/2 in., and plugging the pump into an extension cord, which both Zoeller and Wayne prohibit.
The seasonal checklist, by email
One email when the season changes — freeze week, spring thaw, hurricane season — with the checklist for that month. No weekly newsletter, no selling your address.
We send one confirmation link first. Every email has a one-click unsubscribe. Privacy.
Check your inbox for the confirmation link; the checklist follows as soon as you click it.
You are on the list. The next email arrives when the season changes.
That did not go through. Check the address and try again.
DryHomeLab is written and reviewed by the team behind HelpMeNow.com, a marketplace that connects homeowners with vetted local contractors for water-damage restoration, plumbing and waterproofing. Before HelpMeNow the same team ran a 24/7 water-damage restoration company in the Seattle area; the equipment on this site is what we specified, bought and ran on real water losses. We publish the rubric behind every score.
- Ran a 24/7 water-damage restoration company, Seattle area
- Operate HelpMeNow.com, a contractor marketplace
- Publishes its scoring rubric